

Main image used with kind permission of Great Basin Peppers
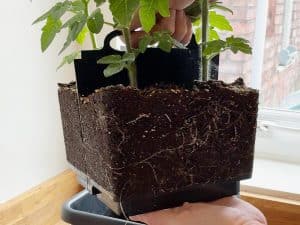
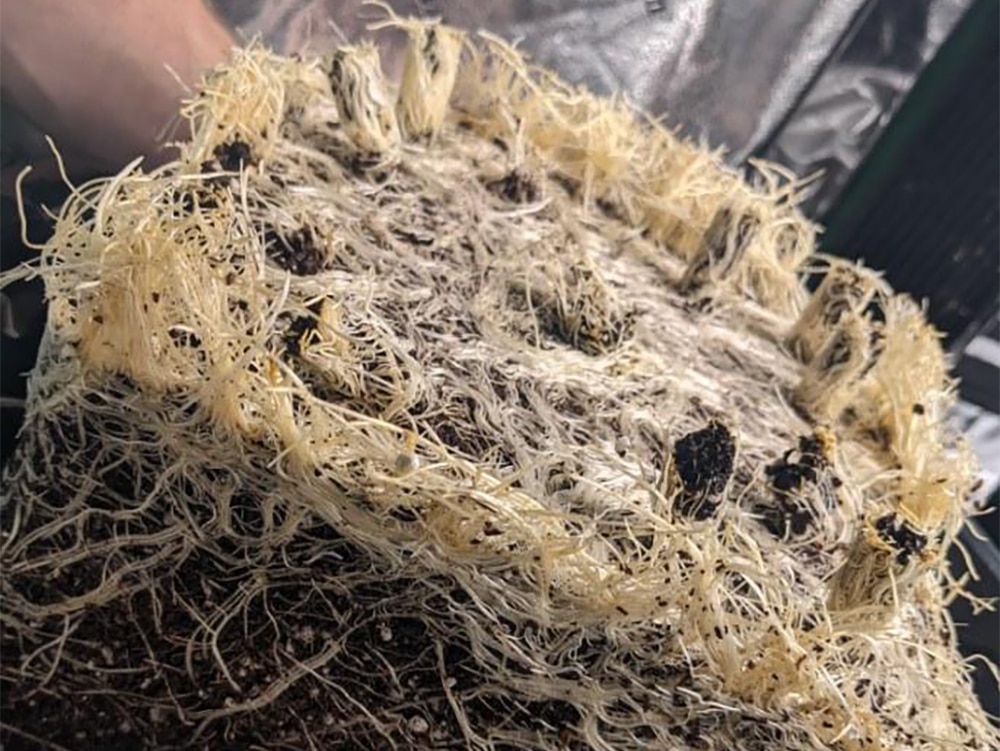
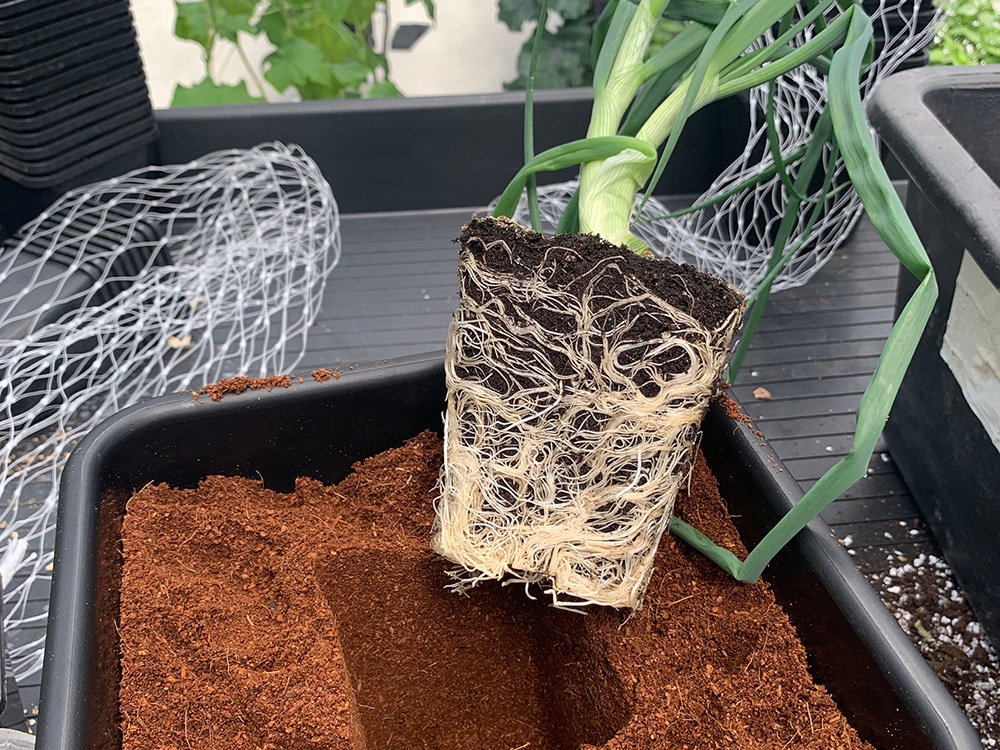
Getting your plants to develop hefty, healthy, keen-feeding roots is a huge part of success with AutoPot Watering Systems. Because the water and nutrient solution flow through the system to the trays beneath your pots you really want a rhizosphere that reaches out and seizes that supply.
Stimulating that kind of ‘hungry’ root development means striking a balance. Naturally, you want to give your plants all they need to thrive, especially in the early stages. But you also need to employ a little bit of tough love now and again in order to drive your plants on to better things. Here’s how.
Wait
Are your plants sufficiently established to go into an AutoPot Watering System in the first place? If not, consider waiting a little longer before pitching them in there. Otherwise the plants may struggle to establish, reach the bottom of the pot, and start feeding.
We suggest the following as a guide according to the system being used:
easy2grow 8.5L / 2.2 gal pots – Min. plant height 150mm / 6″
1Pot 15L / 3.9 gal pot – Min. plant height 225mm / 9″
FlexiPot / 1Pot XL / XXL 20 / 5 gal – 50L / 13 gal pot – Min. plant height 300mm / 12″
Your plants need to be big enough above the surface that the leaves and stems can get plentiful access to growth-stimulating light and air. They also needs to be big enough below the surface that the roots have a sporting chance of reaching the bottom of the pot to draw up water and fertiliser.
The Drainage Layer
Want a healthy, prolific, dynamic root system that actively seeks out water and nutrients? Then you must use a drainage layer with your AutoPot Watering System.
The drainage layer is about 25mm / 1″ of Growstones, washed gravel or pH stable clay pebbles that you need to put into the bottom of each pot before you add your grow media.
Remember, in an AutoPot Watering System the supply of water and nutrient solution is coming up from below the pot. If that water and nutrient solution goes straight into the grow media you risk it saturating the root zone. And if that happens your roots get can lazy, unhealthy, and inefficient – literally undermining your plants potential.
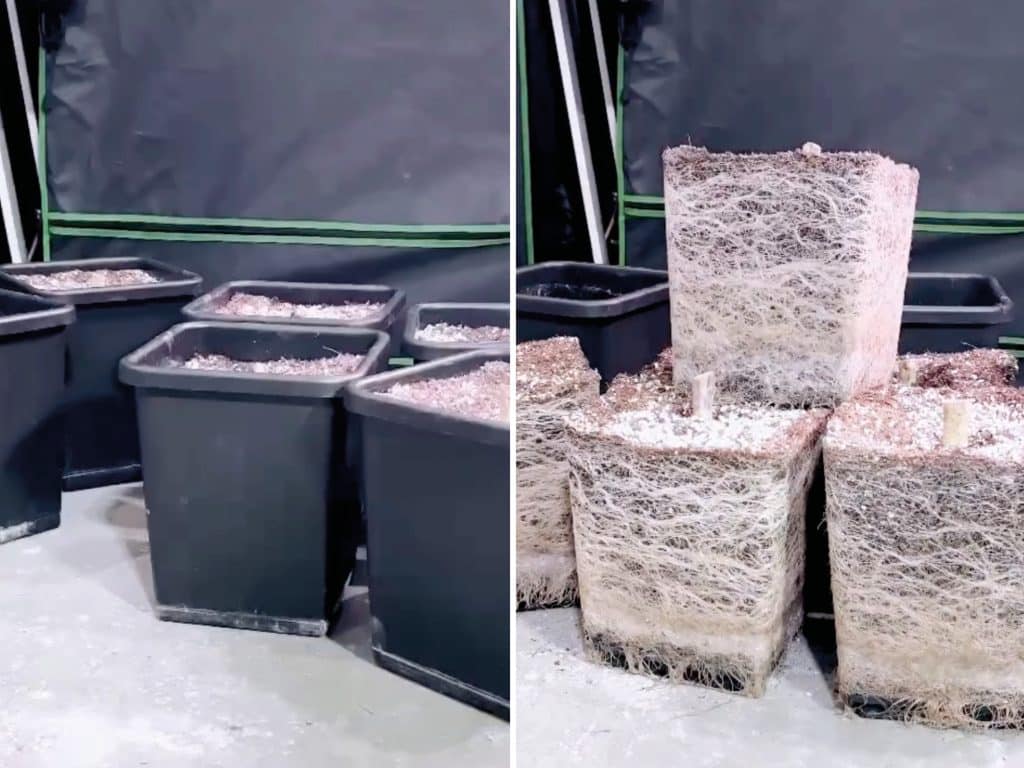
Putting a drainage layer into the pots helps prevent the grow media from getting saturated. Yes, the roots have to do a bit more work to find moisture, but that won’t do them any harm, quite the opposite. As they stretch out they develop a superior structure, feeding ability, and resistance to drought.
Once the roots have grown into the drainage layer they can make direct contact with the water supply coming in from below the pot. The grow media is still doing a vital job – supporting and insulating the roots, helping with uptake and providing a haven for bioactivity. But with this arrangement you’re watering the roots, not the grow media – a far more effective state of affairs.
Want a clean, preparation-free, endlessly reusable drainage layer? Why not take a look at the AirBase. It’s a great alternative to lugging, washing, and pH-stabilising your drainage material. Better still, it can be combined with AirDome. More of which below!
Aerate
For continuous, exponential root growth it’s really important that your grow media is aerated. Yes, your roots may be buried, but they still need to ‘breathe’. You need to somehow get air in there so that those little white hairs on the root tips can draw in oxygen and other gases to power plant processes and stimulate onward growth.
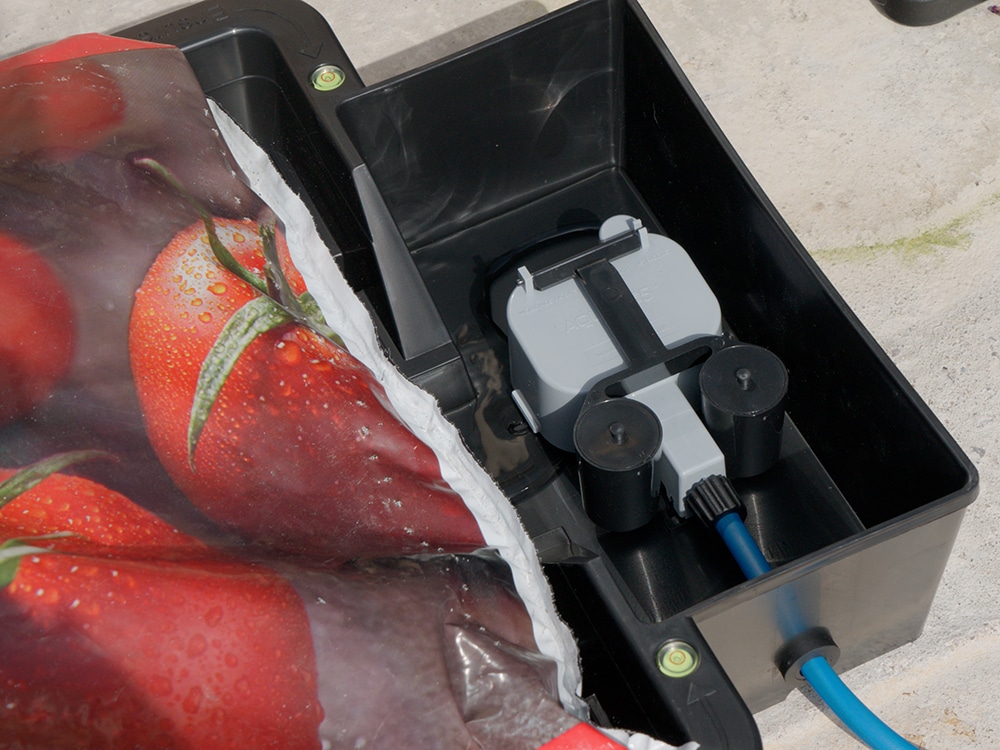
For this we have an ingeniously simple little device called an AirDome. These easy-to-assemble, cheap-to-run bits of kit allow you to introduce air into the root zone via an air pump.
You just pop an AirDome into the bottom of your pot before adding the drainage layer or an AirBase. Then route the air line connected to the AirDome up and over the rim of the pot. Pot up as usual and connect your AirDome to an air pump.
If you find the idea of a powered component daunting then let us reassure you – it is an incredibly intuitive and safe-to-use add-on. The air pump required is nothing at all intimidating, carries no heavy load, and can be plugged straight into a simple segment timer – which in turn goes straight into a mains socket.
Here’s a few little guidelines for use will help you get the very best out of an AirDome:
- Each AirDome needs no more than 1 L / 0.25 gal per minute in pump output
- Wait 2-3 weeks for your plant to establish before switching AirDome on
- Keep air pumps away from cold surfaces and set your timer to switch off at night
- Blow warm air into the root zone – never hot or cold – temps of 18-21°C are perfect
- Always use with an ‘open’ growing media with min. 50% perlite or similar to maximise aeration
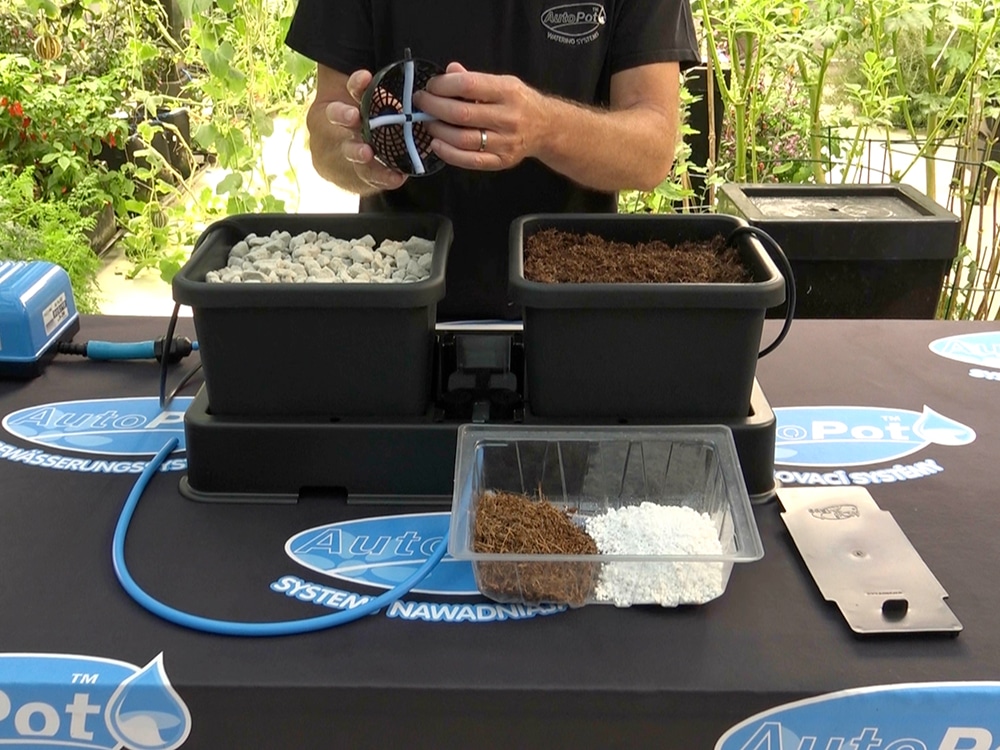
Be Media Savvy
An ‘open’ grow media is exactly what’s called for when growing in an AutoPot Watering System. Blends featuring 60-70% soil or coir and 40-30% clay pebbles or perlite are ideal.
The secondary ingredient prevents the soil or coir from binding or compacting under its own weight. It also helps create texture in the media, producing crannies into which roots can develop and surfaces onto which they can grip.
There are so many excellent options for grow media, there’s an exciting degree of scope with which to experiment, and the systems lend themselves to the use of sustainable materials. Because you’re growing in containers you also have a lot of control over the media – meaning it can easily be regenerated for reuse in future seasons.
Check out our guide to grow media here for more
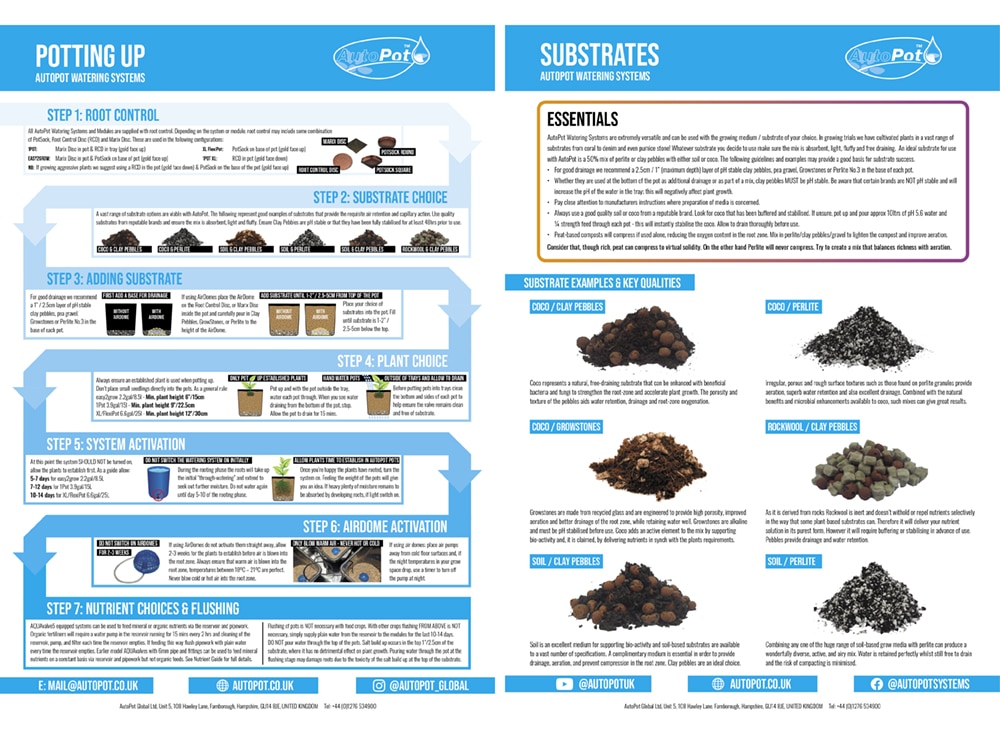
Get Established
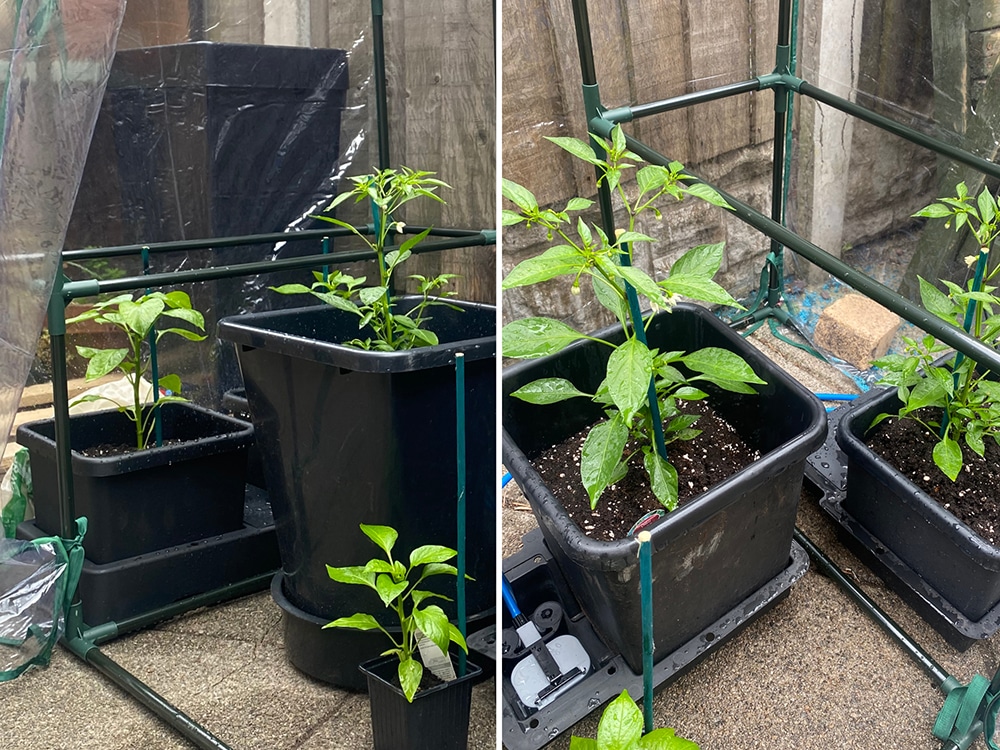
So, you’ve got your plants potted up. Now you need to get the roots functional. They need to acclimatise, take hold, and start growing right down to the bottom of the pots in order to feed. You achieve this is by doing virtually nothing.
Just let the plants establish themselves properly. Establishing your plants means NOT switching on the system immediately. You can hand water through the top of the pots a couple of times but that’s about it. Allow the plants to fully occupy the pots – with leaves that are starting to reach the rims.
Then, after the last of your hand waterings, wait for at least the following before switching on the supply from the system:
5-7 days with an easy2grow system (8.5L / 2.2 gal pots)
7-10 days with a 1Pot system (15L / 3.9 gal pots)
10-14 days with XL / FlexiPot / XXL systems (20-50L / 5-13 gal pots)
During this time the roots will spread out (not actually in search of water but thanks to geotropism as they orientate to gravity). Nonetheless, the roots will be on the move, over the shock of transplantation, and ready to receive when it is time to activate the system.
Observe
When you do switch on your system make sure you’re watching closely. The first few fills of your module trays can be very informative as to where the roots are up to and whether you should stay switched on or pause it. If uptake appears slow then switch the system off and see how long it takes for the module trays to run dry.
Having one slow-feeding plant in a system where others are thriving can be a bit of an issue. You don’t really want to turn off the entire setup just to wait for the latecomer to develop. This is where inline taps are incredibly handy. By adding an inline tap next to each module you can isolate – activating and deactivating at will.
Onwards
Given that they’re almost completely inaccessible, it’s difficult to directly observe or intervene with your roots once your plants are growing. But there a few things you can do to keep tabs on them.
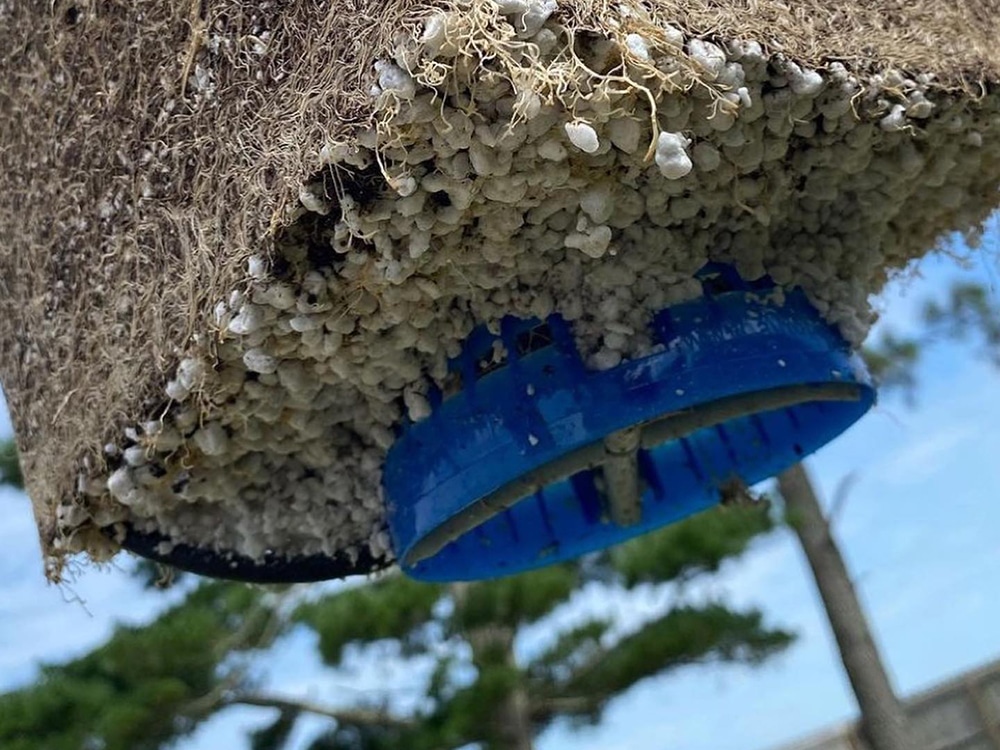
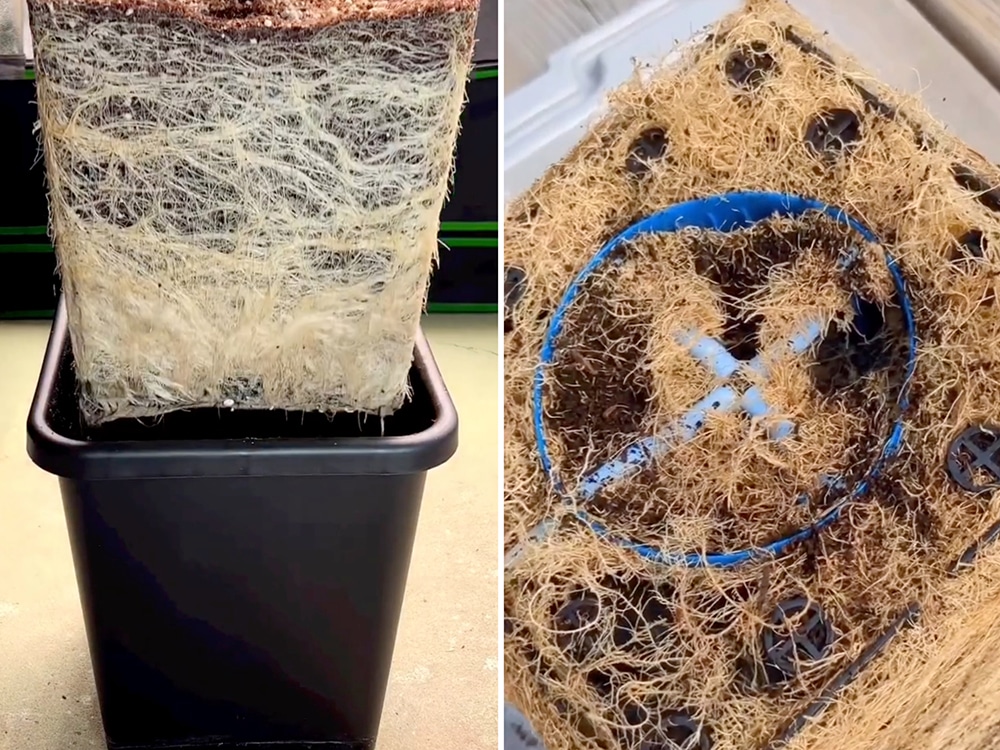
AutoPot pots have slits in their bases to allow for uptake, so lifting the pots (carefully, and only where practical / safe) should reveal the extent of root growth. Looking at the bases you should be able to see whether the roots are directly reaching / breaching the slits and accessing the water and nutrient solution in the tray beneath.
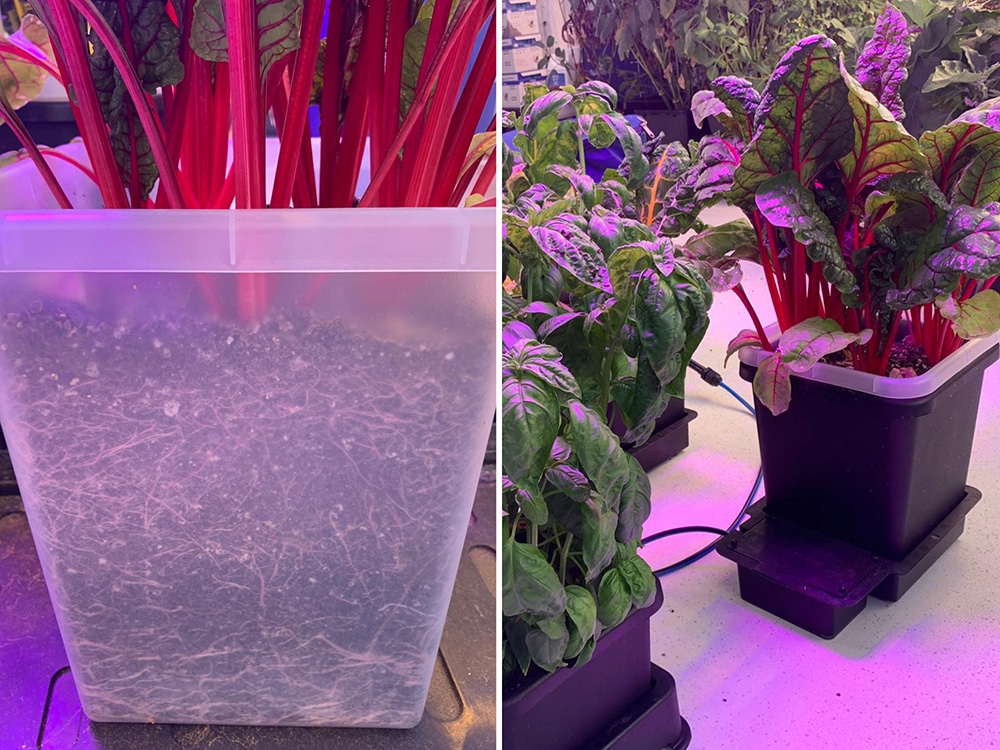
Check out the internal sides of the pot as well. If the grow media is pulling away from the sides it’s possible that the root system is starting to get seriously big. If this media contraction is occurring and your plant is not yet fully developed you may want to consider transferring to a larger pot.
Potting-on is possible without having to change your entire system. The 8.5L pots that come as standard in easy2grow systems can easily be switched for 15L versions.
Finally, read the signs in your leaves, stems, and generally plant health. It’s not that complicated, if the plant is looking vigorous, developing a bushy structure, showing vibrant, turgid leaves, and strong stems you can be fairly sure your root system is working well. If overall health is failing then it’s not a given that the roots are ailing, but it’s certainly worth considering. In that instance look for pests in the media, have a sniff for unpleasant odours (a sign of root rot) and check that visible roots look white / creamy.
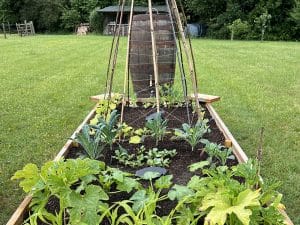
Images used with kind permission @project_grows and @autopotamus (insta)
Any number of root remedies are available for all manner of ills and most are easy to use with AutoPot. That said, you should never pour anything through the top of your pots if you’ve been feeding nutrients via the system. As the direction of travel for nutrients in AutoPot is upward you run the risk of washing safely deposited mineral residues back down into the lower root zone – which can adversely affect development.
Rooting About?
Want a handy guide to root-enhancing grow techniques with AutoPot? Check out the downloadables on our site here