

With our latest innovation in automatic plant watering flying off the shelves we thought that this would be an excellent time for a little dip into Khloris system setup.
Whether you’ve laid hands on a Khloris or are still weighing it up, this guide is designed to give a full appreciation of just how easily the systems go together and offer a few handy, performance-maximising tips to boot.
Fancy skipping ahead to a certain topic? Take your pick of the tips using the directory below:

Layout
One of the great things about Khloris Watering Systems is their flexibility in terms of positioning. You can arrange them at will using the fittings supplied and tailor the pipes to your exact requirements. That’s liberating. But during setup this freedom might also seem a bit daunting – especially for first-timers.
As supplied, Khloris pipe comes in a single length. How you divide it up to suit your layout is almost 100% your decision. So where should you make a cut? How much pipe will you need to connect everything without things getting tight? What should you do if you need to adjust a length? All valid questions, easily resolved with a quick ‘dry run.’
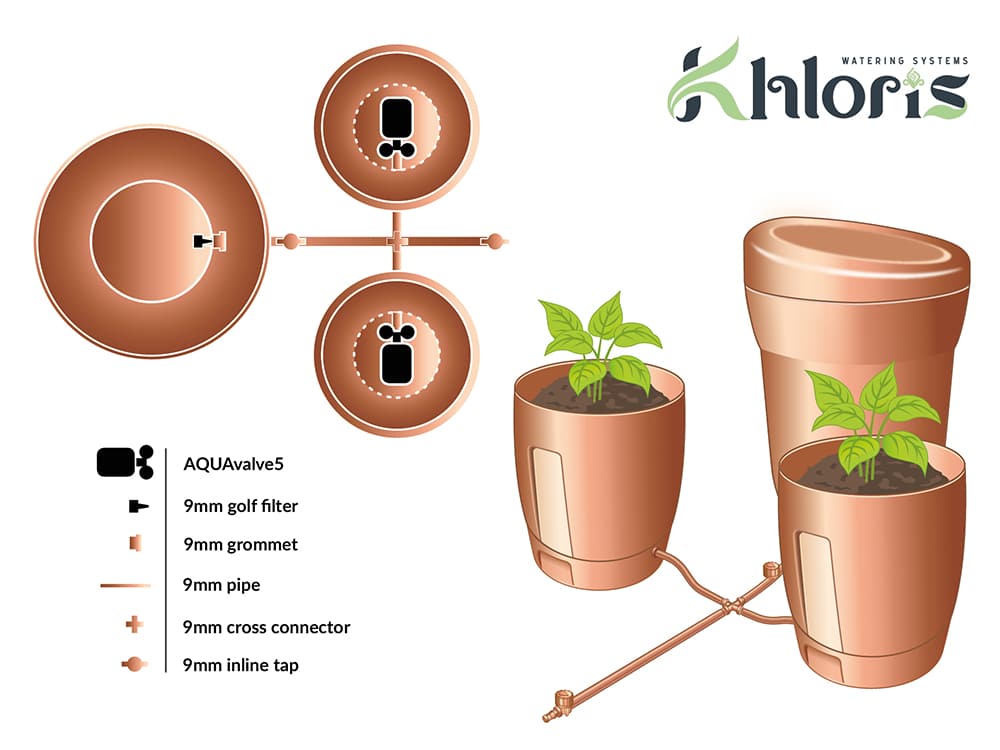
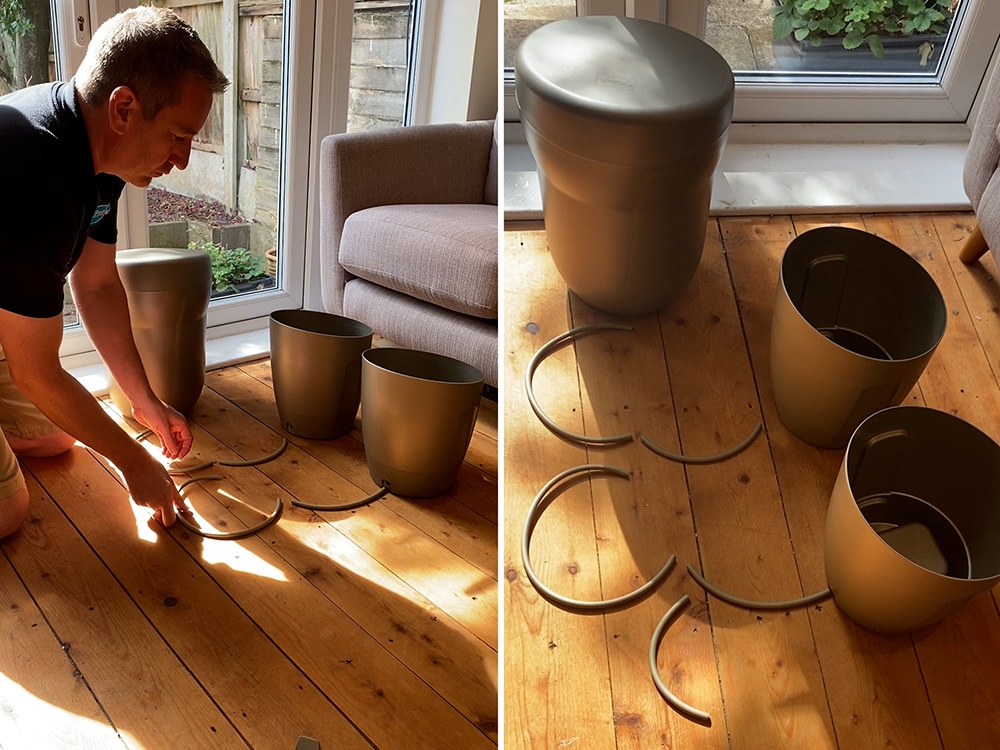
Above: Khloris Layout Option 2 – the X-Configuration
The Dry Run
In order to decide your pipe lengths our advice would be to set out your bases, pots, and reservoir before you start to connect anything.
Get the pots in position according to your preferred lighting source. See where the Reservoir is best placed for access and filling. Decide whether you’re opting for a ’T’ or ‘X’ configuration. Lay your Tee or Cross Connectors in place accordingly. Then whip your pipe out, lay it between these system components, and prepare to snip.
Making The Cut
When cutting the pipe into lengths, the only absolute rules are that:
- The pipes that go into Bases and Reservoirs should be a minimum of 15cm / 5.5” in length
These minimum lengths are simply to ensure that there’s enough pipe to connect the fittings within a Base or Reservoir to the wider system. Beyond that the pipes can be as long or as short as you need them to be.
Roughly lay out the lengths of pipe between the Reservoir, pots, and fittings. Too slack? No problem, you can trim a little pipe here or there. Happy? Now you’re good to go!
Drainage
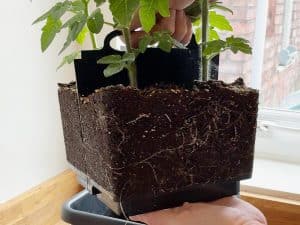
Khloris Watering Systems provide water and (if desired) fertiliser from beneath the pots to the roots of the plants. It’s a very direct approach to irrigation that can minimise waste, maximise growth, and produce spectacular results through sheer responsiveness. But it’s important that it’s not a 100% ‘direct’ approach.
For this method to work properly there needs to be a layer of ‘drainage’ material between the water supply and the grow media. Otherwise the plants would have their roots situated in saturated grow media – not a healthy or productive scenario.
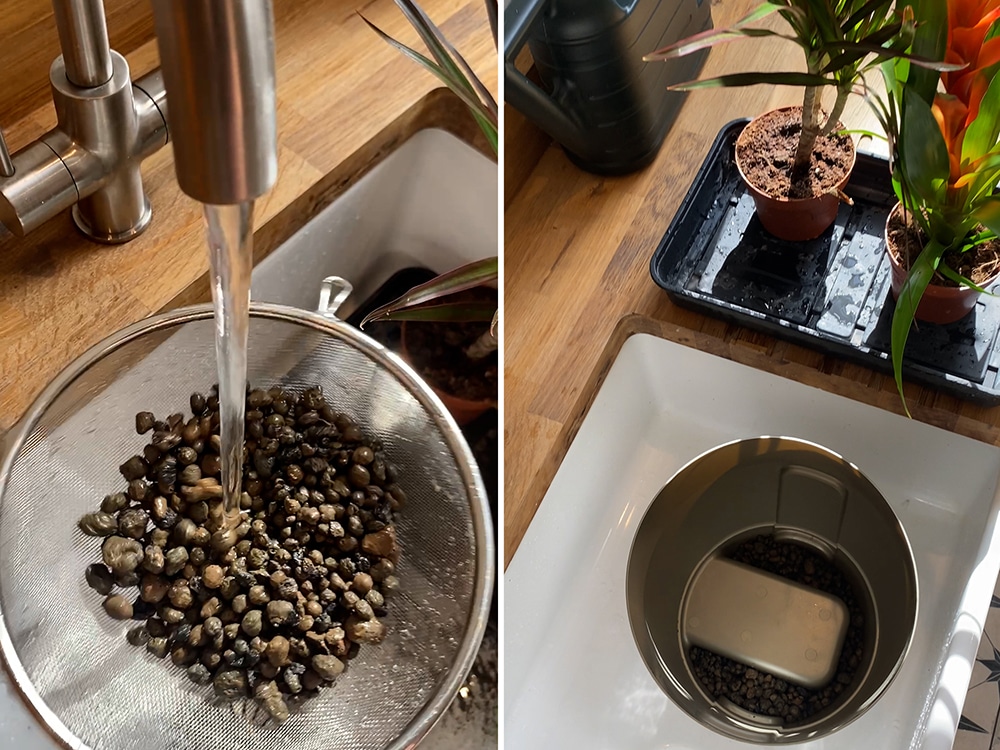
With Khloris, drainage material is supplied with the system in the shape of Clay Spheri Pebbles. Each System and Extension comes with a bag of these irregularly shaped little pellets that go into the bottom of each pot before you add your grow media and plants.
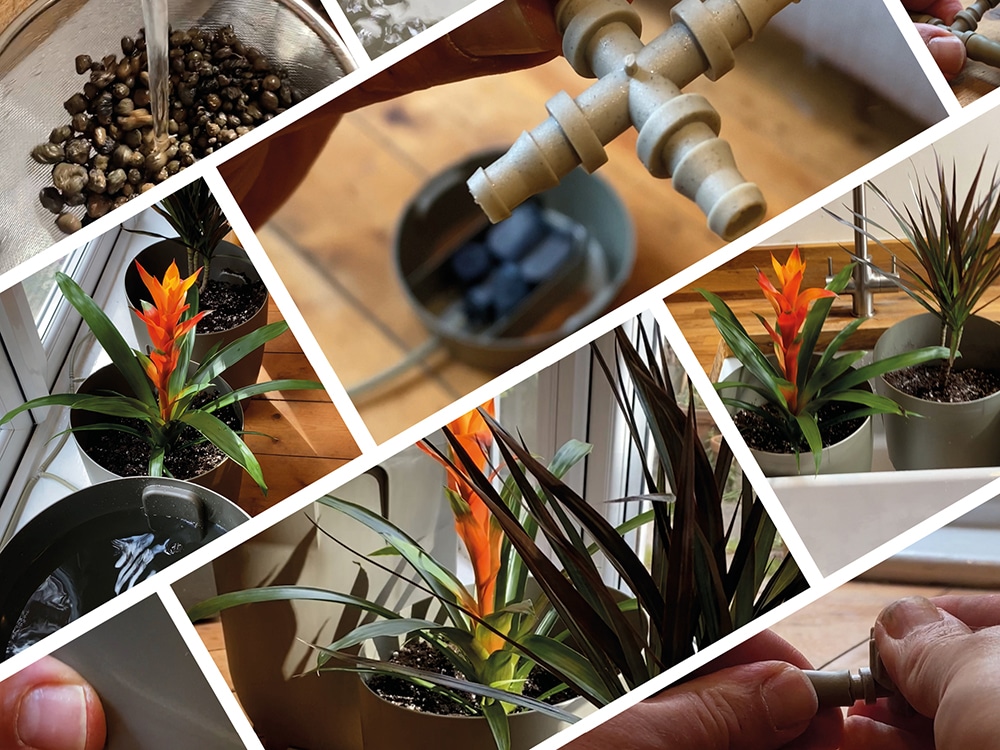
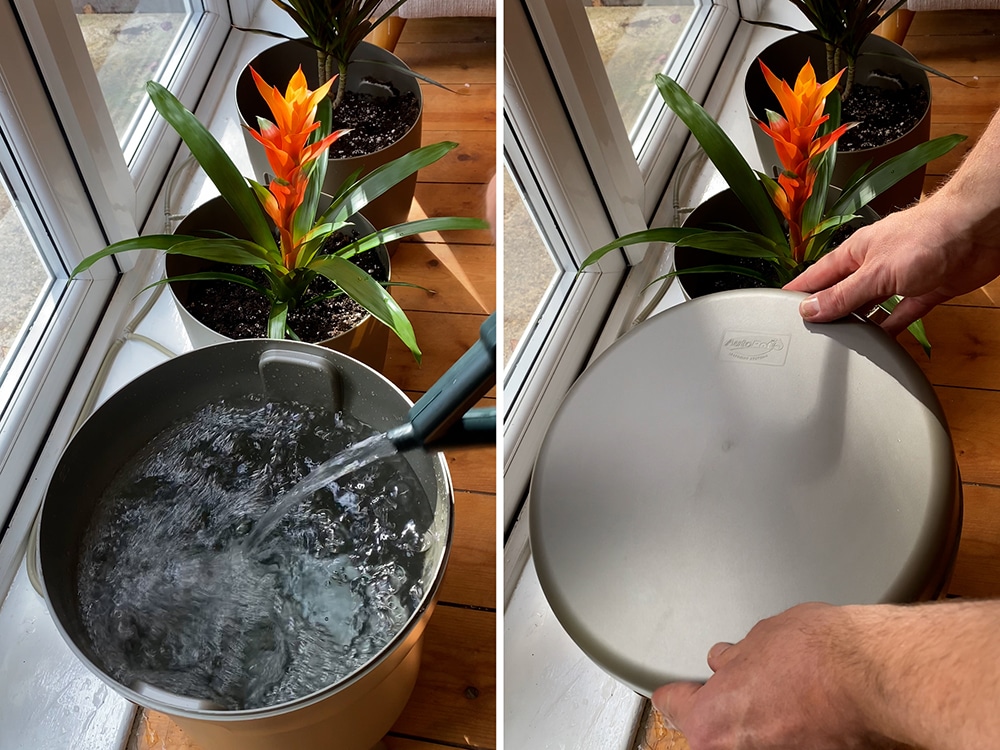
The Pebbles have a natural sediment to them that needs to be rinsed off with running water before use. It’s only a matter of minutes in a sieve under a cold tap. Then the Pebbles can be added to the pots. Ensure they are all down in the areas around the raised centre section inside the pot.
Pottering Away
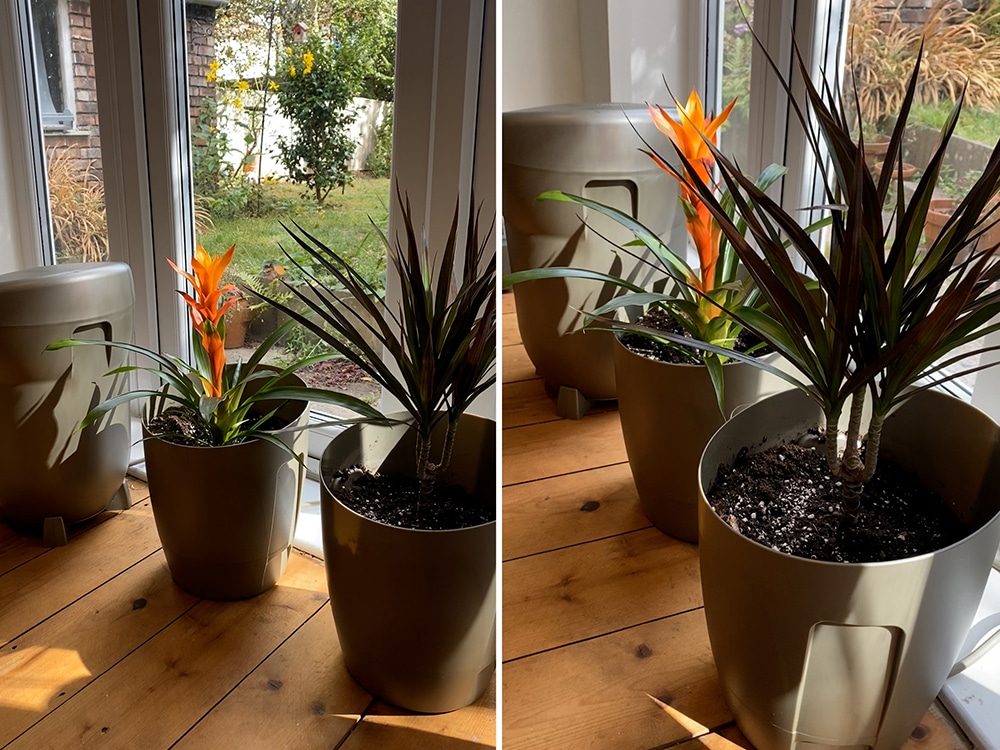
It’s best to pot up your plants before connecting up your system. That way you can get them nicely nestled, watered through, and set them aside to drain while you work.
A vast range of grow media types are suitable for use with plants in Khloris systems, there’s just a few basic guidelines to consider when selecting:
- Choose a blend, something that combines soil or coco coir with an aerating ingredient – such as perlite or clay pebbles. Mix thoroughly.
- Your blend should ideally contain 30-50% of the aerating ingredient to help stimulate ‘capillary action’ (the drawing of water and fertiliser up to the roots) and prevent waterlogging.
- Never pot up with soil alone as this can become waterlogged and / or compacted.
- Choose a specialist grow media containing bark if growing orchids.
- Take a look at the packaging on your grow media and figure out whether it contains a ‘charge’ of fertiliser. If so, factor that into your feeding regime. Perhaps hold off from adding liquid fertiliser to the reservoir for the first few weeks.

The System
Finally we’re going to let you lay hands on the system! The intervening tinkering may seem like a frustrating delay but in truth it’ll set you in good stead to set up quickly and confidently.
In truth the system building stages are best described by the system instructions – there’s no more concise way of visualising and understanding the tasks at hand. So for this section we’ll just mention a few tips that’ll really ease assembly.
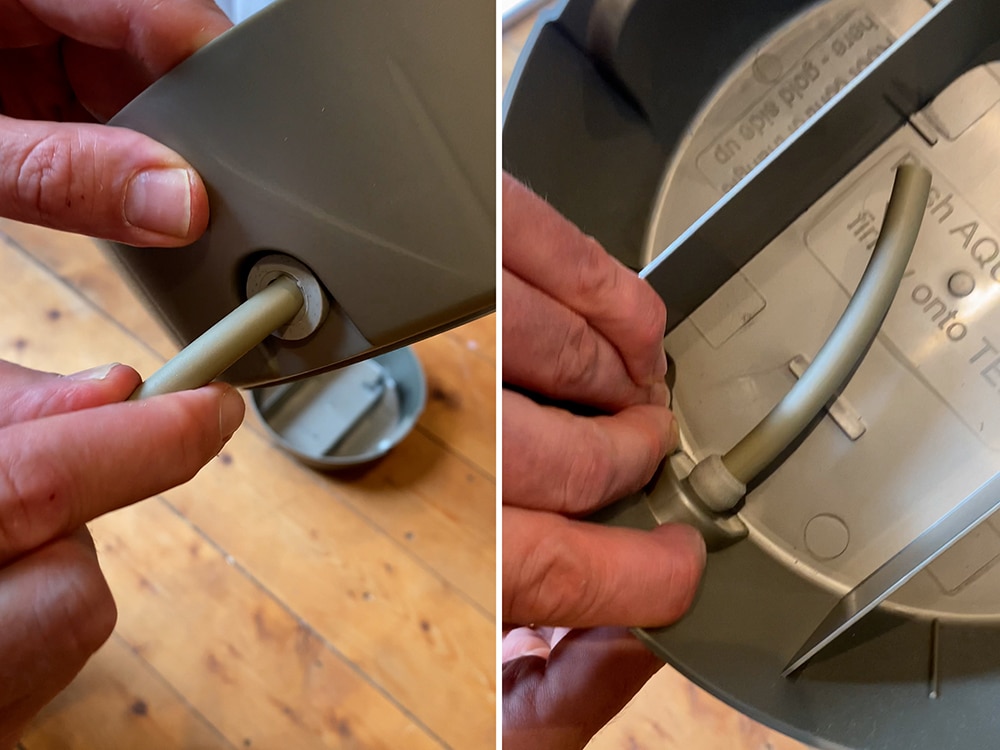
The System – Assembly Tips – Inserting & Connecting Pipe
- When inserting pipe through grommets harden the end in cold water to aid insertion
- When connecting pipe to fittings soften the end in hot water to aid connection
- When disconnecting pipe from fittings soften the end in hot water to aid disconnection
The System – Assembly Tips – AQUAvalves
- Ensure the Top and Bottom Float silicones in each AQUAvalve are properly inserted. See Simple Care Guide in the instructions for positions
- Don’t over-tighten the AQUAvalve collar when reattaching – there’s no need
- Make sure the half moon section on the rear of the AQUAvalve is properly seated onto the T section on the Base – press down on the body of the AQUAvalve only – not the Top Float
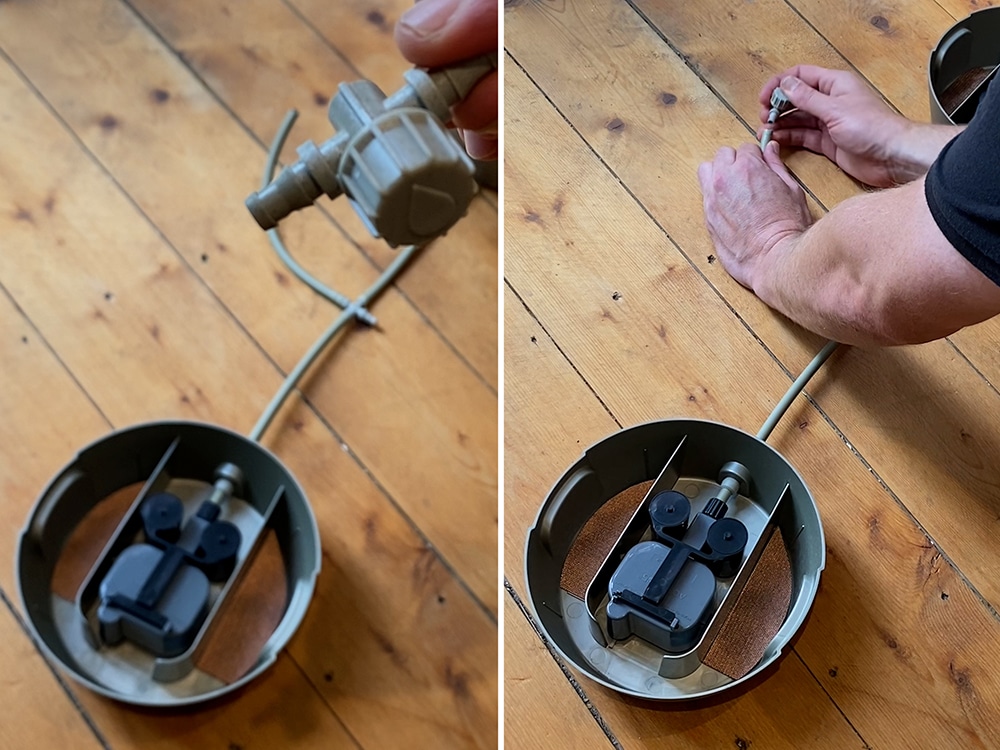
The System – Assembly Tips – Taps
- When you’ve finished connecting your pipes to your bases you should have a loose pipe end
- Attach one inline tap (supplied) to the loose pipe end
- When the system is in use this tap will allow you to draw off a little water and fertiliser periodically and prevent naturally occurring sediment from accumulating
- Bleeding the system in this way ensures a fast and responsive flow of irrigation to the plants
The Reservoir
Again, Reservoir setup is best covered by the instructions, and it is an absolute doddle. But there are just a few lil pointers worth mentioning and ‘sidebars’ that may satisfy the curiosity of inquisitive assemblers.
The Reservoir Stand – What’s This All About Then?
A shapely and benevolent source of live-giving irrigation, your Khloris Reservoir is in many ways quite god-like. How appropriate then that you should set it upon a pedestal – the Khloris Reservoir Stand.
This Stand is an essential part of the Reservoir, giving it the stability and elevation required for proper function. So don’t forget to use it when setting up. Ditto the Lid, to keep your water secure and shielded from light.
The Reservoir – Assembly Tips – Taps
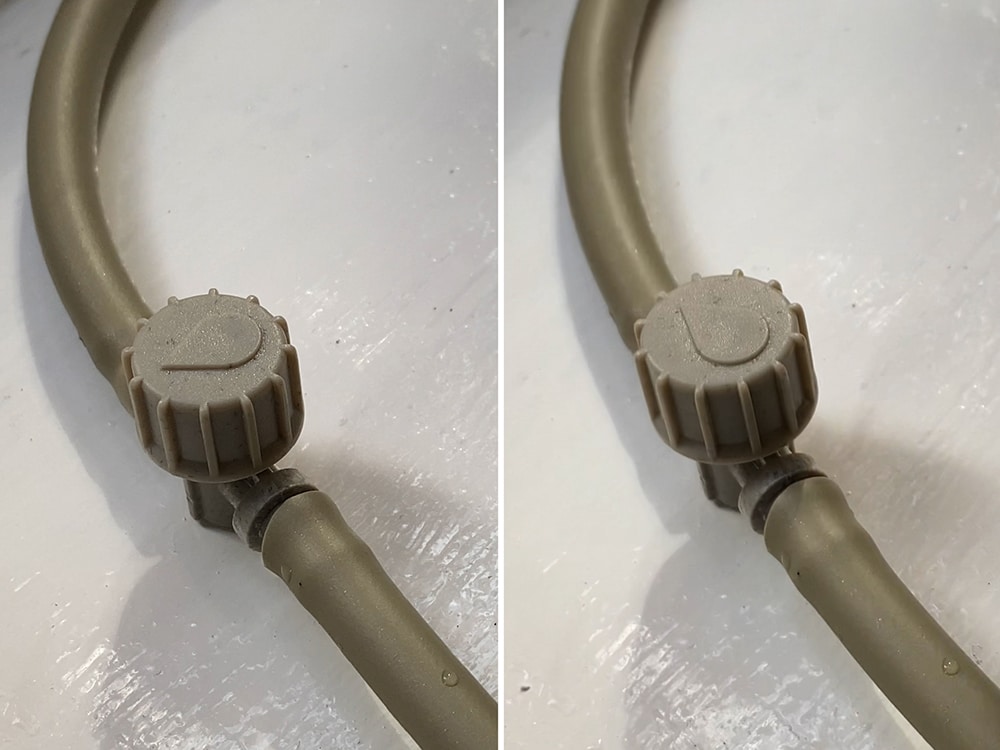
By the time you get to Reservoir assembly you should have one inline tap remaining. This tap is to be inserted into the pipe outside the Reservoir. Having this tap in place allows you to switch the supply of water on and off when required and remove the Reservoir for occasional cleaning:
- When the droplet on the tap head is across the line of the pipe the tap is closed
- When the droplet on the tap head is in-line with the pipe the tap is open
Further Adventures – Extending Khloris
If you’re enjoying Khloris (and why the heck wouldn’t you be!?) you can always expand your system using an Extension Kit. These matching add-ons include an additional pot, base, and internals, plus all the fittings required to create a larger layout that perfectly suits your growing space.
You can use Extension Kits to create a Khloris System of up to four pots in total. If you’re in an empire-building frame of mind you can venture beyond four pots with the use of an additional reservoir.
Everything you need to create and expand a Khloris System is available now at autopot.co.uk. Contact mail@autopot.co.uk for RoW stockists and autopot-usa.com for details in the USA.