


Got an AutoPot Watering System set up? Got it nicely dialled-in, irrigating and feeding a thriving selection of plants? Think you should leave well alone? For sure you can take a ‘hands-off’ approach at this point. By all means do. That’s the point of having a system.
But wouldn’t you like to know what’s going on in there? To get up close and personal with the inner workings of your watering wonder? It’s well worth a look. That being the case, we thought we’d take you through a few simple things to observe safely whilst your system is in use.
This isn’t a full maintenance guide, no, no, no. We have those available on our website as easily downloadable pdfs and also in the appendices of our brochures. This here is more of an adventure (?!) for the curious AutoPot grower who wants to get in touch with their system a little bit more.
Working ‘upstream’ (from the plants back to the reservoir) let’s start with the all important pots.
Pots
Once these are placed in your system you can still actually move them if you need to. As long as it is safe to do so for you and your plants. But why would you want to?
Well, one reason might be to adjust positioning. If you find some plants are growing in shade you can simply swap pots around within your tray(s) to ensure all are getting sufficient light.
To minimise mess you’re best doing this after temporarily switching off the tap on your reservoir (or better still, switching off an inline tap adjacent to the parts of the system under inspection).
Allow the plants to take up all the water in the trays before lifting the pots to organise as desired. After repositioning don’t forget to turn the system back on.
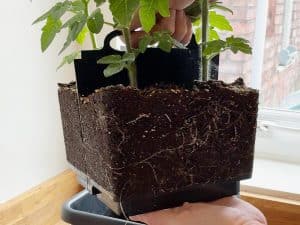
In the early stages of growth a quick look at the underside of the pots can also reveal just how much progress the roots are making towards feeding from the trays beneath. Again, switch off the system and allow plants to empty the trays. Then check out the pot base.
Nice white roots peeping through the slits in the bottom of the pot? You’re well on your way. No roots just yet? Don’t panic, but consider switching off for a short while so your plants can use up everything in the pot and get thirsty – stretching out their roots in search of your water source. Your plants will grow stronger if you encourage the roots to seek water.
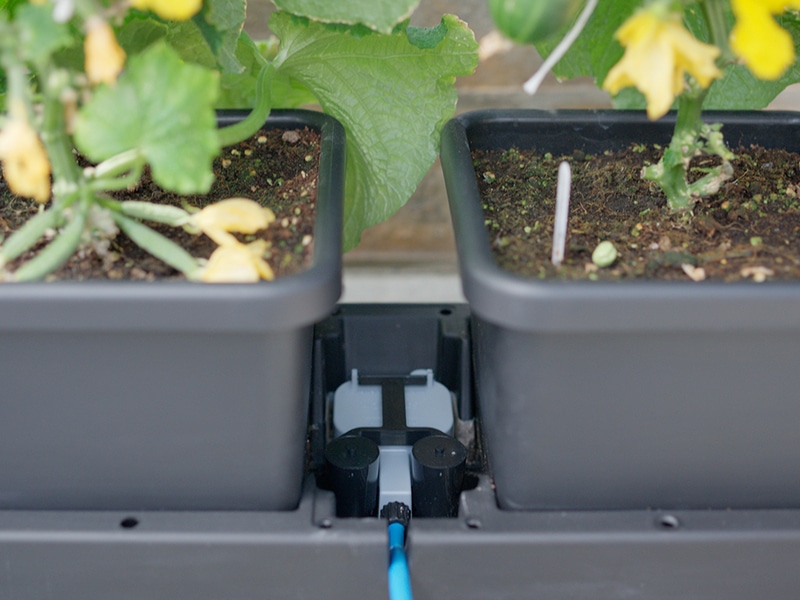
Trays
Roots peeping through the base of the pots is good. Roots invading the adjacent AQUAvalve compartment is not good – as it can impair the performance of the water control device. Really it shouldn’t happen if your root control is set up. But if it does you can safely remove any rogue rhizo’ without fear of damaging your plant.
on your roots and ensure none go rogue
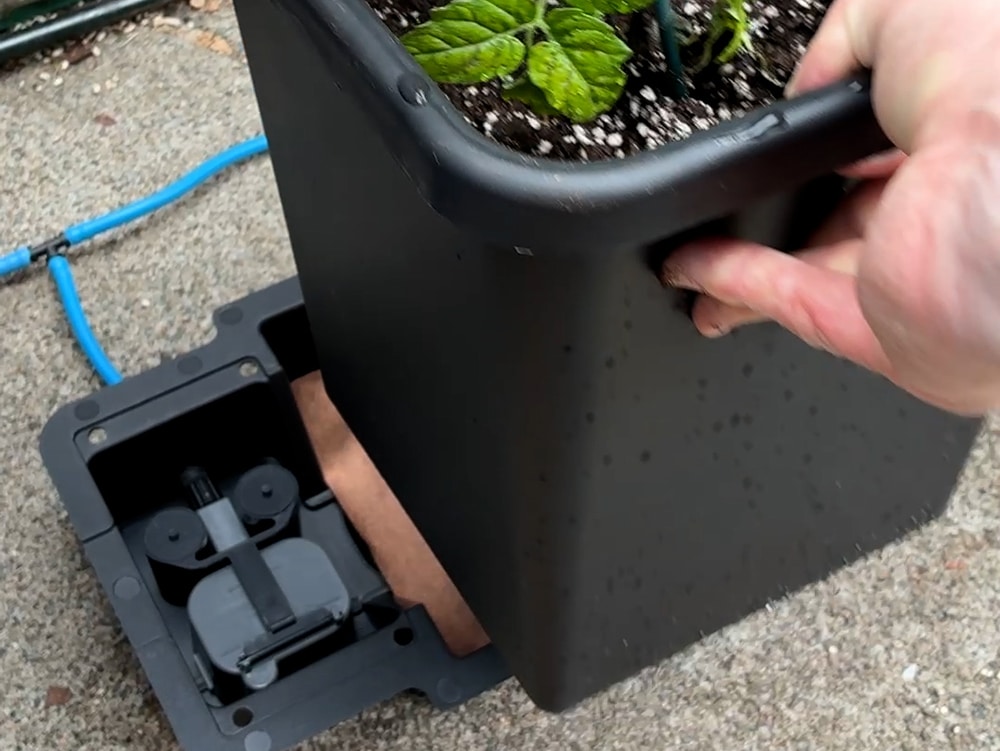
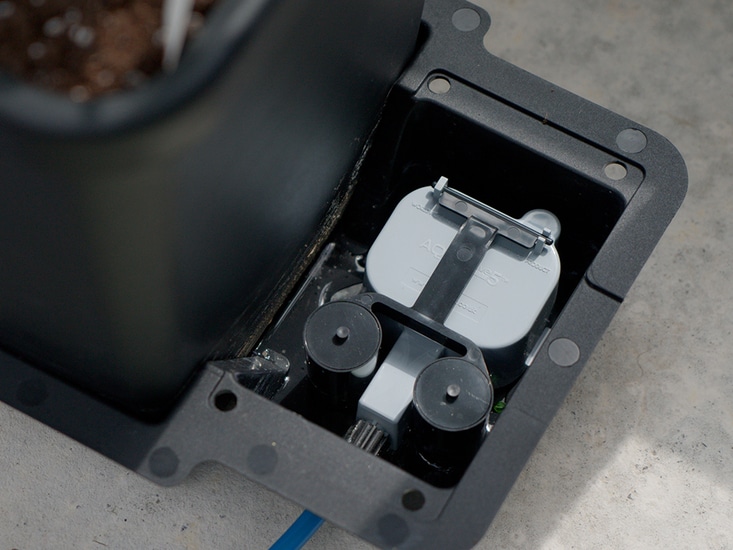
The AQUAvalve:
Don’t be shy! Lift off the lid that conceals the AQUAvalve in your system and watch that unique patented water control device in motion.
If you do this when first switching your system on you’ll easily be able to appreciate the action. That’s a really good time to do it anyway. Looking at it at this point means you can be sure that the AQUAvalve is securely seated and that the tray is filling correctly (to about halfway up the collar).
If your system is already underway simply switch off, allow the plants to empty the trays, switch back on and see how that mighty mechanism magically meters out water.
Should a tray be filling a little more than desired you can remedy it in-situ. Follow the usual steps to switch off and once the tray is dry lift up the Top Float on the AQUAvalve. Push the Top Float Silicone on the underside hard into position and swing the Top Float back down atop the AQUAvalve.
easy2GO growers simply place their AQUAvalves on a tray with potted plants. Sometimes a bit of a tweak to pipe length might be needed to ensure the AQUAvalve in an easy2GO is sitting nice and flat on the tray surface. Slackening off can help, or a small weight on top of the AQUAvalve Cover that comes with the kit might do the trick.
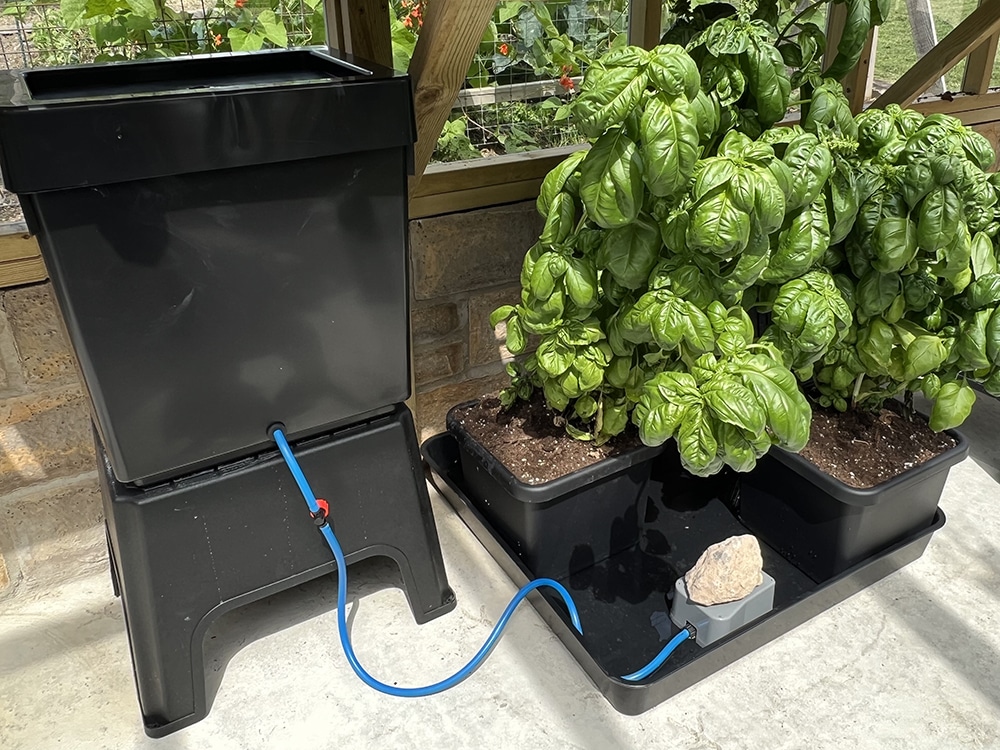
of your easy2GO Kit helps keep everything secure
Fittings:
Because there’s no electricity, mains water pressure, or computer control on an AutoPot Watering System it is very easy to inspect and adjust your fittings mid-grow.
Say you want to add a module, remove a module, ease a tight fitting pipework curve, add an isolating tap, smoothly route into a garden tray, double a connection, (breathe), extend a run, add a flush tap, or cap off an end. You can do all of that whilst your system is set up. Do the switch off drill and get in there.
Reservoir
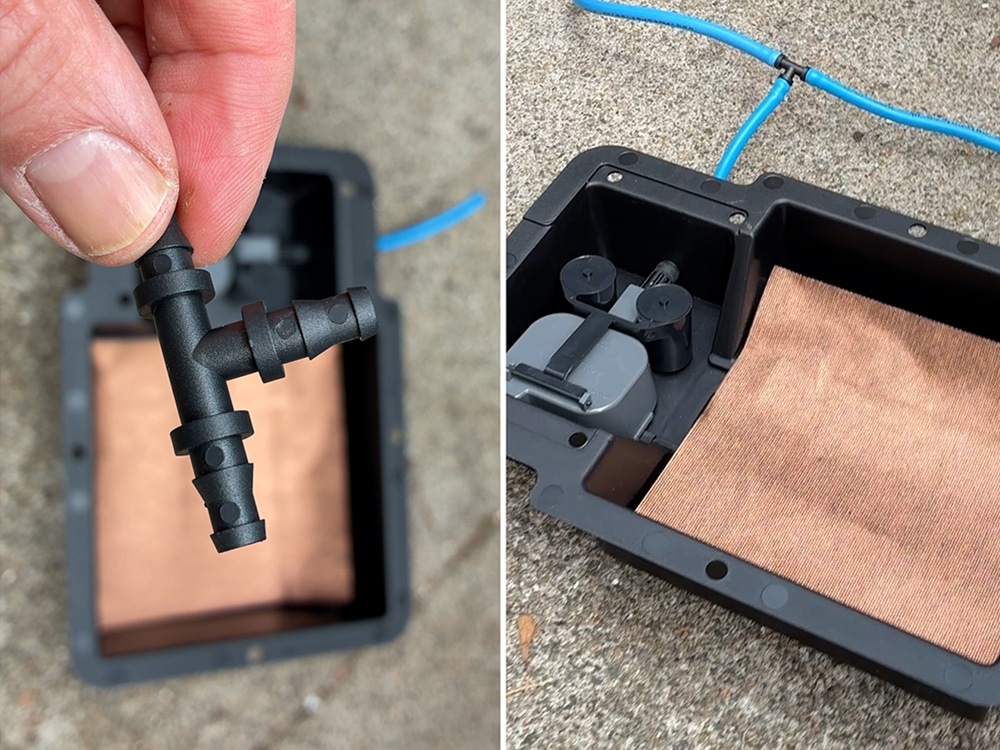
Lift the lid, what can you see? Hopefully some water. If you’ve got a reservoir with an internal filter you should also see that lil fella down there, ‘the bouncer’, stoically guarding your system from riff-raff elements, ensuring that only the finest, cleanest water and fertilisers join the party.
Like all guards, your filter needs relieving from his watch every so often. He needs a break. He needs opening up and having his insides washed out. Otherwise he’ll just get aggy / blocked. Run the usual switch-off drill, only you don’t need to wait for the trays to empty. Then pop the filter off and give him a good hot soapy wash, rinse out with cold water, and replace.
If your filter is external you can still do likewise. Our click-fit and Pro filters all disassemble, clean down, and go back together easily. You can even give the connectors on them a spritz with an AutoPot Pipe Cleaner, while you’re at it.
In Conclusion
Don’t be afraid of your system! Whilst it’s important to be careful with it and not impede growth you can get involved with it once set up, it won’t bite, and knowing it better will make you a better grower.